How to add Facebook Pixel and Domain verification to WordPress and WooCommerce
Facebook Pixel (or Meta Pixel) is a piece of code which allows measuring and optimizing your website or online store for Facebook ads. In order to use it you need to add Facebook Pixel code to Woo or WordPress website.
Today we’ll learn how to add Meta Pixel and Facebook Domain verification code to WordPress website and WooCommerce online store without any additional plugins. It will only take a few minutes, and you’re ready to go with your Facebook ads.
How to add Facebook Domain verification code to WordPress or Woo
Sometimes Facebook requires to add domain verification code to your site.
If you want to add Facebook domain verification code to your WooCommerce or WordPress website, go to WordPress admin panel, and choose Appearance >> Theme File Editor or Tools >> Theme File Editor in admin menu.
Once you’re there, open file named functions.php . You’ll find it on the right side of the screen.
Now scroll to the bottom of the file, and add this function to the end of the file:
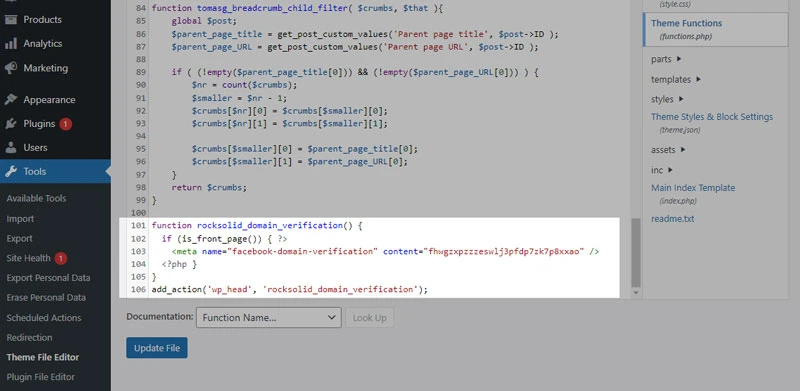
function rocksolid_domain_verification() {
  if (is_front_page()) { ?>
    <meta name="facebook-domain-verification" content="fhwgzxpzzzeswlj3pfdp7zk7p8xxao" />
  <?php }
}
add_action('wp_head', 'rocksolid_domain_verification');
Just replace the line <meta name=”… /> with your own Facebook domain verification code, and hit Save Changes button. Facebook requires having domain verification code only in homepage, so we only load it there.
Here how it looks like in the actual functions.php file:

That’s it – facebook domain verification code is added. Now let’s move to Meta Pixel code.
Adding Facebook Pixel to WooCommerce stores and WordPress websites
Adding Meta Pixel (or Facebook Pixel – the same thing) to WordPress and Woo is fairly easy process.
Go to your WordPress admin panel, and as previously, open Appearance >> Theme File Editor or Tools >> Theme File Editor in admin menu. Then open functions.php file on the right, and scrool to the end of the file. Then paste this function.
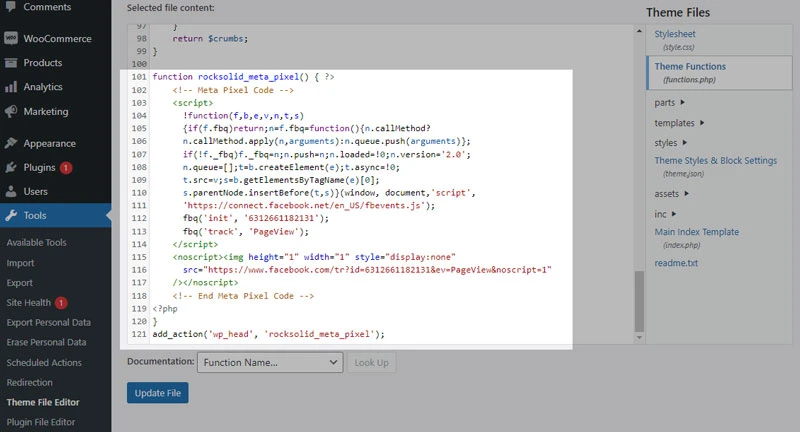
function rocksolid_meta_pixel() { ?>
	<!-- Meta Pixel Code -->
	<script>
	  !function(f,b,e,v,n,t,s)
	  {if(f.fbq)return;n=f.fbq=function(){n.callMethod?
	  n.callMethod.apply(n,arguments):n.queue.push(arguments)};
	  if(!f._fbq)f._fbq=n;n.push=n;n.loaded=!0;n.version='2.0';
	  n.queue=[];t=b.createElement(e);t.async=!0;
	  t.src=v;s=b.getElementsByTagName(e)[0];
	  s.parentNode.insertBefore(t,s)}(window, document,'script',
	  'https://connect.facebook.net/en_US/fbevents.js');
	  fbq('init', '6312661182131');
	  fbq('track', 'PageView');
	</script>
	<noscript><img height="1" width="1" style="display:none"
	  src="https://www.facebook.com/tr?id=6312661182131&ev=PageView&noscript=1"
	/></noscript>
	<!-- End Meta Pixel Code -->
<?php
}
add_action('wp_head', 'rocksolid_meta_pixel');
Don’t forget to replace example Pixel code with your own Meta Pixel Code (everything between <script> tags).
After you’ll add your own Facebook Pixel code, hit Save changes at the bottom of the page, and your Facebook Pixel code is ready to be used. Here how it looks like in the admin panel:

Adding both Facebook Pixel and Facebook Domain Verification code to one function in WordPress
If you need both Pixel and domain verification codes in your WordPress or Woo website, you can combine both of previously mentioned functions into one:
function rocksolid_meta() {
   if (is_front_page()) { ?>
    <meta name="facebook-domain-verification" content="fhwgzxpzzzeswlj3pfdp7zk7p8xxao" />
  <?php } ?>
	<!-- Meta Pixel Code -->
	<script>
	  !function(f,b,e,v,n,t,s)
	  {if(f.fbq)return;n=f.fbq=function(){n.callMethod?
	  n.callMethod.apply(n,arguments):n.queue.push(arguments)};
	  if(!f._fbq)f._fbq=n;n.push=n;n.loaded=!0;n.version='2.0';
	  n.queue=[];t=b.createElement(e);t.async=!0;
	  t.src=v;s=b.getElementsByTagName(e)[0];
	  s.parentNode.insertBefore(t,s)}(window, document,'script',
	  'https://connect.facebook.net/en_US/fbevents.js');
	  fbq('init', '6312661182131');
	  fbq('track', 'PageView');
	</script>
	<noscript><img height="1" width="1" style="display:none"
	  src="https://www.facebook.com/tr?id=6312661182131&ev=PageView&noscript=1"
	/></noscript>
	<!-- End Meta Pixel Code -->
<?php
}
add_action('wp_head', 'rocksolid_meta');
Just replace example Meta Pixel code and verification codes with your own, and it’s done!
Want to add Google Analytics to WordPress or WooCommerce?
Then follow our tutorial here
Need quick WordPress help?
Get your website fixed, optimized, or migrated — fast, secure, and handled personally by a developer with 15+ years of experience.